
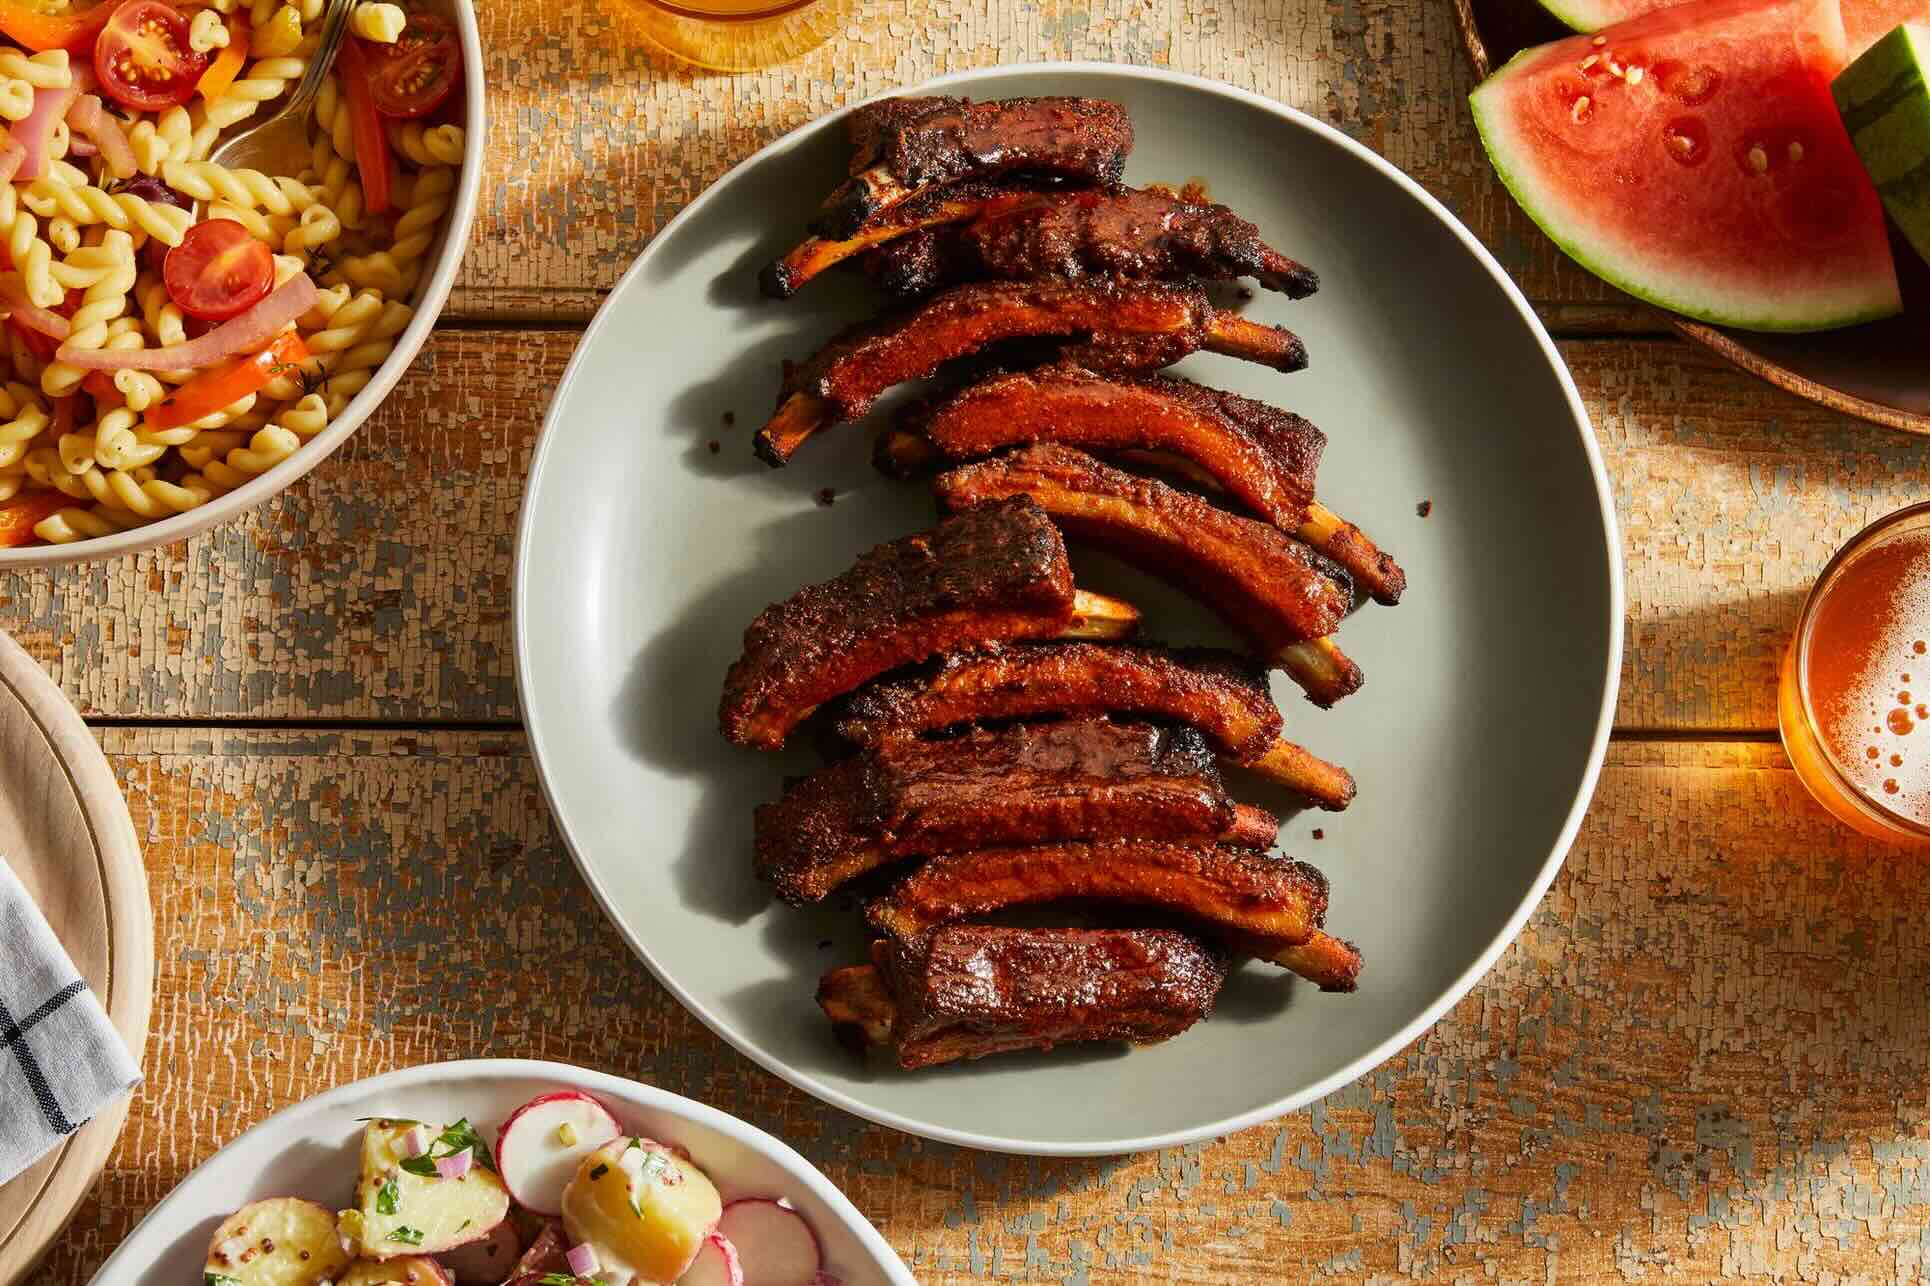
I love this dry rub for ribs because it turns simple meat into something full of flavor and a little bit of spice. It’s one of those recipes that makes cooking feel like a fun experiment, and the smell while it’s cooking is amazing. I can’t wait for you to try it and see how it brings your ribs to life.
Most of the ingredients in this dry rub are common spices you might already have in your kitchen, like paprika, salt, and black pepper. If you don’t have cayenne pepper, it’s worth picking up at the supermarket because it adds a nice kick without being too hot. Brown sugar is also important here because it helps create a sweet balance to the spices and helps the ribs caramelize when cooking.
Ingredients For Dry Rub For Ribs Recipe
Paprika: Adds a mild, smoky flavor and a beautiful red color to the rub.
Brown sugar: Brings sweetness and helps the ribs caramelize during cooking.
Salt: Enhances all the flavors and helps tenderize the meat.
Black pepper: Adds a sharp, slightly spicy taste.
Garlic powder: Gives a savory, garlicky depth without the moisture of fresh garlic.
Onion powder: Adds a subtle sweetness and enhances the overall flavor.
Cayenne pepper: Provides a gentle heat that wakes up the taste buds.
Technique Tip for This Recipe
When you’re ready to rub the dry rub mixture over your ribs, doing it generously and evenly is the secret to getting great flavor all over. Here’s a simple way to make sure every bite tastes amazing:
- Start by patting your ribs dry with a paper towel. This helps the dry rub stick better.
- Take a handful of the dry rub and sprinkle it over the ribs.
- Use your fingers or the palm of your hand to press the mixture into the meat. Don’t just sprinkle it on top—pressing helps the spices stick and soak in.
- Flip the ribs and repeat on the other side, making sure to cover every spot.
- If you have time, let the ribs sit with the dry rub for at least 30 minutes before cooking. This gives the flavors a chance to sink in.
Doing this makes cooking smoother because the dry rub won’t fall off while you’re handling or cooking the ribs. Plus, pressing the spices in helps the ribs get a nice crust that’s full of flavor and texture.
I remember the first time I tried this, I just sprinkled the dry rub on and didn’t press it in. When I flipped the ribs on the grill, half the rub fell off! After that, I started pressing it in, and the difference was huge. The ribs tasted way better, and the crust was perfect. If you’re in a hurry, even a quick press with your hand makes a big difference. It’s a small step that really pays off!
Suggested Side Dishes
Alternative Ingredients
paprika - Substitute with smoked paprika: Adds a smoky flavor that enhances the depth of the rub.
brown sugar - Substitute with white sugar mixed with molasses: Provides a similar sweetness and moisture.
salt - Substitute with kosher salt: Has a coarser texture and can be used in the same quantity.
black pepper - Substitute with white pepper: Offers a milder peppery flavor without the black specks.
garlic powder - Substitute with granulated garlic: Provides a similar garlic flavor with a slightly different texture.
onion powder - Substitute with granulated onion: Similar flavor profile with a coarser texture.
cayenne pepper - Substitute with red pepper flakes: Adds a similar heat level with a slightly different texture.
Other Alternative Recipes to Try
How To Store / Freeze Your Ribs
- Ensure your dry rub is stored in an airtight container. This helps maintain its freshness and potency.
- Label the container with the date of preparation. This way, you can keep track of its shelf life.
- Store the container in a cool, dark place, such as a pantry or cupboard. Exposure to light and heat can degrade the spices.
- If you plan to keep the dry rub for an extended period, consider storing it in the refrigerator. This can help prolong its shelf life.
- For even longer storage, you can freeze the dry rub. Place it in a freezer-safe bag or container, ensuring it is well-sealed to prevent moisture from getting in.
- When ready to use, allow the dry rub to come to room temperature before applying it to your ribs. This ensures even coating and better flavor absorption.
- Always use a clean, dry spoon to scoop out the dry rub. This prevents contamination and moisture from getting into the mix.
- Avoid storing the dry rub near strong-smelling foods or spices, as it can absorb unwanted odors.
- Regularly check the dry rub for any signs of clumping or changes in aroma. If it smells off or has hardened, it's best to make a fresh batch.
How To Reheat Leftovers
Preheat your oven to 250°F (120°C). Wrap the leftover ribs in aluminum foil to retain moisture. Place them on a baking sheet and heat for about 20-30 minutes, or until they reach an internal temperature of 145°F (63°C). This method ensures the ribs stay juicy and flavorful.
If you're in a hurry, use the microwave. Place the ribs on a microwave-safe plate and cover them with a damp paper towel. Heat on medium power for 2-3 minutes, checking halfway through to ensure they don't dry out. This method is quick but may not preserve the texture as well as other methods.
For a smoky flavor, reheat the ribs on a grill. Preheat your grill to medium-low heat. Wrap the ribs in aluminum foil and place them on the grill for about 10-15 minutes, turning occasionally. This method adds a fresh, smoky taste to your leftovers.
Use a sous vide machine for precise temperature control. Seal the ribs in a vacuum bag and immerse them in a water bath set to 140°F (60°C) for about an hour. This method ensures even reheating without drying out the meat.
If you have an air fryer, preheat it to 350°F (175°C). Place the ribs in the basket and heat for 5-7 minutes. This method gives the ribs a crispy exterior while keeping the inside tender.
For a stovetop method, use a skillet. Heat a small amount of olive oil or butter in the skillet over medium heat. Add the ribs and cover with a lid. Heat for about 5-7 minutes, turning occasionally to ensure even reheating. This method adds a nice sear to the ribs.
Essential Tools for This Recipe
Mixing bowl: A large bowl used to combine all the dry rub ingredients thoroughly.
Spoon: A utensil used to mix the ingredients together until they are evenly combined.
Measuring spoons: Tools used to measure out the precise amounts of each ingredient to ensure the correct balance of flavors.
Rib rack: An optional tool to hold the ribs upright if you are cooking a large quantity, ensuring even cooking.
Plastic wrap: Used to cover the ribs after applying the dry rub, allowing the flavors to meld if you choose to let them sit before cooking.
Baking sheet: A flat sheet used to place the ribs on if you are baking them in the oven.
Tongs: A tool to handle the ribs without removing the rub, ensuring the seasoning stays intact.
Time-Saving Tips for This Recipe
Pre-mix the rub: Combine all ingredients in advance and store in an airtight container. This saves time when you're ready to cook.
Use a shaker: Place the dry rub in a spice shaker for quick and even application on your ribs.
Double the recipe: Make a larger batch of the dry rub and store it for future use. This minimizes prep time for your next barbecue.
Prep the ribs early: Apply the rub to the ribs the night before and refrigerate. This allows the flavors to penetrate and saves time on cooking day.
Dry Rub for Ribs Recipe
Ingredients
Dry Rub Ingredients
- 1 tablespoon Paprika
- 1 tablespoon Brown Sugar
- 1 tablespoon Salt
- 1 tablespoon Black Pepper
- 1 tablespoon Garlic Powder
- 1 tablespoon Onion Powder
- 1 teaspoon Cayenne Pepper
Instructions
- 1. Combine all ingredients in a mixing bowl.
- 2. Mix well with a spoon until evenly combined.
- 3. Rub the mixture generously over your ribs before cooking.
Nutritional Value
Keywords
Suggested Appetizers and Desserts
More Amazing Recipes to Try 🙂
- Pittsburgh Chipped Ham Barbecue Recipe30 Minutes
- Matcha Green Tea Frappuccino Recipe5 Minutes
- Turkey and Bacon Panini Recipe20 Minutes
- Strawberry Vinaigrette Recipe10 Minutes
- Tropical Punch Cocktail Recipe10 Minutes
- Beer Batter Fish Recipe25 Minutes
- Antipasto Pasta Salad Recipe25 Minutes
- Greek Tzatziki Recipe15 Minutes
Leave a Reply