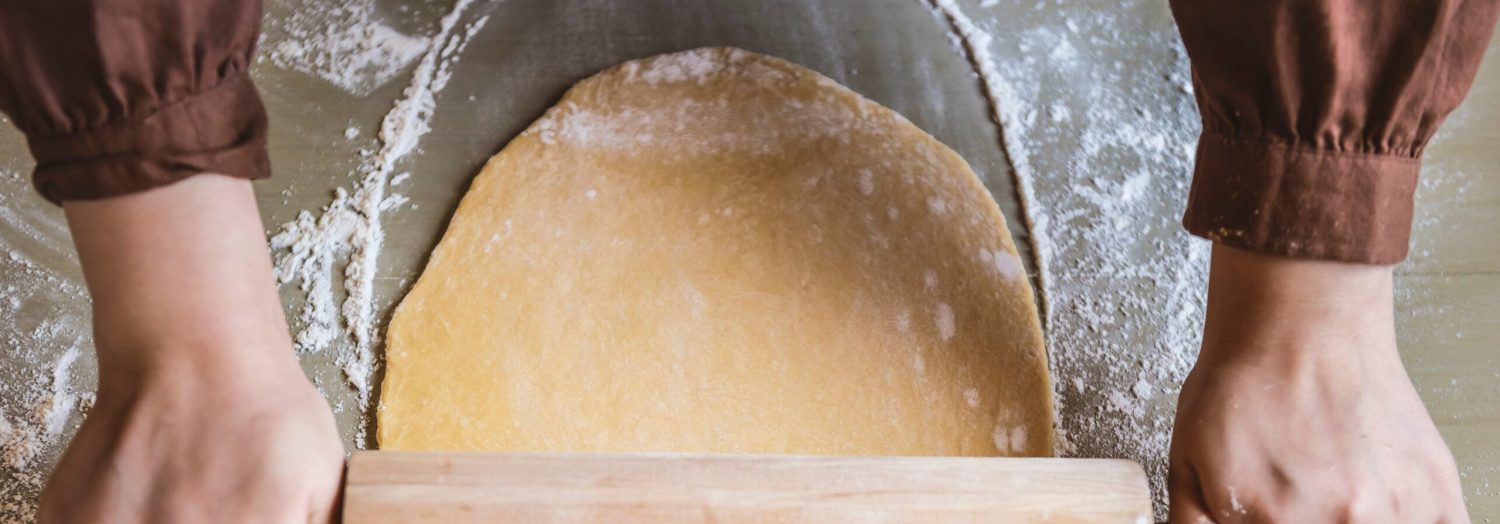

I love making these maple pecan scones because they fill the kitchen with the warm smell of maple syrup and toasted nuts. They’re perfect for a cozy morning or an afternoon treat that feels special but is really simple to make. I can’t wait for you to try them and enjoy every bite!
Most of the ingredients in this recipe are probably already in your kitchen, like flour, sugar, and butter. The one you might want to look for at the store is heavy cream if you don’t usually keep it on hand. Also, make sure to get pure maple syrup, not the flavored kind, because it gives the scones their unique sweet taste. Toasted pecans add a nice crunch, so if you can’t find them toasted, you can toast raw pecans quickly in a pan at home.

Ingredients For Maple Pecan Scones Recipe
All-purpose flour: The main dry ingredient that gives structure to the scones.
Sugar: Adds sweetness to balance the flavors.
Baking powder: Helps the scones rise and become fluffy.
Salt: Enhances the overall flavor.
Butter: Cold butter creates a flaky texture when cut into the flour.
Pecans: Toasted and chopped, they add crunch and a nutty flavor.
Maple syrup: Gives the scones a natural sweetness and that classic maple taste.
Heavy cream: Makes the dough rich and tender.
Vanilla extract: Adds a subtle, sweet aroma that complements the maple.
Technique Tip for Perfect Scones
One of the most important steps in this Maple Pecan Scones Recipe is how you cut in the cold butter. This might sound tricky, but it’s actually pretty simple once you get the hang of it. Here’s how you do it:
- Start with cold butter that’s been cut into small pieces. Cold butter is key because it helps create those flaky layers in your scones.
- Add the cold butter pieces to your dry ingredients (like flour, sugar, baking powder, and salt).
- Use a pastry cutter, two forks, or even your fingers to press and mix the butter into the dry ingredients. You want to break it down until the mixture looks like coarse crumbs — kind of like tiny pebbles.
- Be careful not to overwork it. If the butter melts too much, your scones won’t be as flaky and might turn out dense.
Doing this step right makes your scones light and crumbly, which is exactly what you want. The little bits of cold butter melt in the oven and create steam, which helps puff up the dough and give it that perfect texture.
When I first tried this, I accidentally used room temperature butter, and my scones turned out more like soft cookies. After switching to cold butter, the difference was amazing! Also, if you don’t have a pastry cutter, no worries — just use your fingers but work quickly so the butter stays cold. It’s a small step that really makes a big difference in how your scones turn out.
Suggested Side Dishes
Alternative Ingredients
all-purpose flour - Substitute with whole wheat flour: Whole wheat flour adds a nutty flavor and increases the fiber content.
sugar - Substitute with honey: Honey provides natural sweetness and adds moisture to the scones.
baking powder - Substitute with baking soda and cream of tartar: Use ¼ teaspoon baking soda and ½ teaspoon cream of tartar for each teaspoon of baking powder needed.
salt - Substitute with sea salt: Sea salt has a more complex flavor and can enhance the taste of the scones.
cold butter - Substitute with coconut oil: Coconut oil can be used as a dairy-free alternative and adds a subtle coconut flavor.
toasted chopped pecans - Substitute with toasted chopped walnuts: Walnuts provide a similar texture and nutty flavor.
maple syrup - Substitute with agave nectar: Agave nectar is a lower glycemic index sweetener and can be used in the same quantity.
heavy cream - Substitute with coconut cream: Coconut cream is a dairy-free alternative that provides a rich and creamy texture.
vanilla extract - Substitute with almond extract: Almond extract adds a different but complementary flavor to the scones.
Alternative Recipes to Try
How to Store or Freeze Your Scones
Allow the scones to cool completely on a wire rack before storing. This ensures they don't become soggy from trapped steam.
For short-term storage, place the scones in an airtight container. They can be kept at room temperature for up to 2 days. To maintain their freshness, add a small piece of apple or a slice of bread to the container to help retain moisture.
If you plan to keep the scones for a longer period, wrap each one individually in plastic wrap or aluminum foil. This prevents them from drying out and protects them from freezer burn.
Place the wrapped scones in a resealable freezer bag or an airtight container. Label the bag or container with the date to keep track of their storage time.
Scones can be frozen for up to 3 months. When ready to enjoy, thaw them at room temperature for about an hour or overnight in the refrigerator.
To reheat, preheat your oven to 350°F (175°C). Place the scones on a baking sheet and warm them for about 10 minutes, or until heated through. This will help restore their crispy exterior and soft interior.
For a quick reheat, you can also use a microwave. Place a scone on a microwave-safe plate and heat on medium power for 20-30 seconds. Be cautious not to overheat, as this can make the scone tough.
If you prefer a freshly baked taste, you can freeze the scones before baking. Follow the recipe up to the point of cutting the dough into wedges. Place the unbaked scones on a baking sheet lined with parchment paper and freeze until solid. Transfer the frozen scones to a resealable freezer bag or airtight container.
When ready to bake, preheat your oven to 400°F (200°C). Place the frozen scones on a parchment-lined baking sheet and bake for 20-25 minutes, or until golden brown. You may need to add a few extra minutes to the baking time since they are frozen.
How to Reheat Leftovers
Oven Method:
- Preheat your oven to 350°F (175°C).
- Place the scones on a baking sheet lined with parchment paper.
- Lightly cover the scones with aluminum foil to prevent them from drying out.
- Warm the scones for about 10 minutes or until they are heated through.
- Remove the foil for the last 2 minutes if you want a slightly crispier exterior.
Microwave Method:
- Place a scone on a microwave-safe plate.
- Cover the scone with a damp paper towel to keep it moist.
- Microwave on medium power for 20-30 seconds.
- Check the scone and add additional 10-second intervals if needed until warm.
Toaster Oven Method:
- Preheat your toaster oven to 350°F (175°C).
- Place the scones directly on the toaster oven rack or on a small baking sheet.
- Heat for 5-7 minutes, checking frequently to avoid over-browning.
- For a crispier texture, you can toast them for an additional 1-2 minutes.
Stovetop Method:
- Preheat a non-stick skillet over low heat.
- Place the scones in the skillet and cover with a lid to trap the heat.
- Warm each side for about 2-3 minutes, flipping halfway through.
- Check frequently to ensure they do not burn.
Air Fryer Method:
- Preheat your air fryer to 320°F (160°C).
- Place the scones in the air fryer basket in a single layer.
- Heat for 3-5 minutes, checking halfway through to ensure even warming.
- Remove and let cool slightly before enjoying.
Steam Method:
- Fill a pot with a small amount of water and bring it to a simmer.
- Place a steaming basket over the simmering water.
- Arrange the scones in the basket, making sure they do not touch the water.
- Cover and steam for about 5 minutes or until warmed through.
- This method helps retain moisture, making the scones soft and tender.
Best Tools for Baking
Oven: Preheat to 400°F (200°C) to bake the scones until golden brown.
Baking sheet: Line with parchment paper to prevent the scones from sticking.
Parchment paper: Used to line the baking sheet for easy cleanup and to prevent sticking.
Large mixing bowl: Combine the dry ingredients like flour, sugar, baking powder, and salt.
Pastry cutter: Cut in the cold butter until the mixture resembles coarse crumbs.
Whisk: Whisk together the maple syrup, heavy cream, and vanilla extract.
Small mixing bowl: Mix the wet ingredients separately before combining with the dry ingredients.
Spatula: Mix the wet and dry ingredients until just combined.
Floured surface: Turn the dough out onto this surface to knead gently.
Knife: Cut the dough into 8 wedges.
Cooling rack: Let the scones cool slightly before serving.
How to Save Time on Baking
Pre-measure ingredients: Measure out all ingredients ahead of time to streamline the baking process.
Use a food processor: Quickly cut in the cold butter using a food processor instead of doing it by hand.
Toast pecans in advance: Toast and chop the pecans ahead of time to save a step during preparation.
Mix wet ingredients together: Combine the maple syrup, heavy cream, and vanilla extract in advance to quickly add to the dry mixture.
Shape dough directly on parchment: Pat the dough into a circle directly on the parchment paper to avoid transferring it later.
Maple Pecan Scones
Ingredients
Scone Ingredients
- 2 cups all-purpose flour
- ⅓ cup sugar
- 1 tablespoon baking powder
- ½ teaspoon salt
- ½ cup cold butter cut into small pieces
- ½ cup chopped pecans toasted
- ½ cup maple syrup
- ⅓ cup heavy cream
- 1 teaspoon vanilla extract
Instructions
- Preheat your oven to 400°F (200°C). Line a baking sheet with parchment paper.
- In a large mixing bowl, combine the flour, sugar, baking powder, and salt.
- Cut in the cold butter until the mixture resembles coarse crumbs.
- Stir in the chopped pecans.
- In a separate bowl, whisk together the maple syrup, heavy cream, and vanilla extract.
- Pour the wet ingredients into the dry ingredients and mix until just combined.
- Turn the dough out onto a floured surface and knead gently. Pat into a circle about 1 inch thick.
- Cut into 8 wedges and place on the prepared baking sheet.
- Bake for 18-20 minutes, or until golden brown.
- Let cool slightly before serving.
Nutritional Value
Keywords
More Amazing Recipes to Try 🙂
- Refreshing Cucumber Lemonade Recipe10 Minutes
- POG Juice Recipe5 Minutes
- Singapore Sling Cocktail Recipe5 Minutes
- Spicy Seafood Sauce Recipe30 Minutes
- Veggie Spring Rolls with Mango Dipping Sauce Recipe30 Minutes
- Pickled Watermelon Rinds Recipe30 Minutes
- Cocktail Sauce Recipe5 Minutes
- Mexican Sopes Recipe40 Minutes






Leave a Reply