
I’m really excited to share Jessica's pistachio oat squares with you because they’re a perfect mix of crunchy and chewy, making them a great snack any time of day. I love how simple the ingredients are, yet the flavor feels special thanks to the pistachios and honey. Scroll down to see how easy it is to make these tasty squares yourself!
Most of the ingredients in this recipe are pretty common, but pistachios might not be something you always have at home. When you go to the supermarket, look for shelled, unsalted pistachios in the nut section. If you don’t have peanut butter, any smooth nut butter will work too. Honey and rolled oats are usually easy to find in most kitchens or stores.
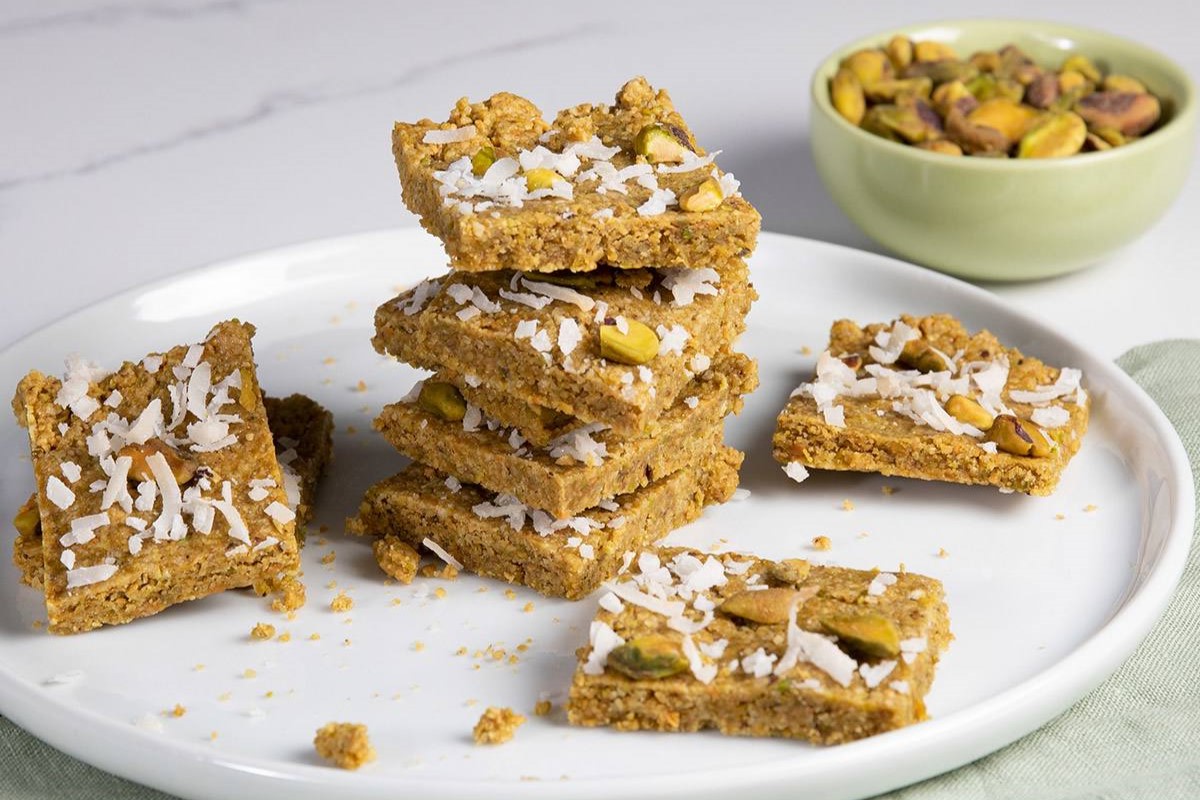
Ingredients For Jessica's Pistachio Oat Squares Recipe
Rolled oats: These give the squares a chewy texture and are a great source of fiber.
Pistachios: Chopped pistachios add a nice crunch and a slightly sweet, nutty flavor.
Honey: Honey naturally sweetens the squares and helps hold everything together.
Peanut butter: This adds creaminess and a rich, nutty taste that blends well with the oats and pistachios.
Vanilla extract: A little vanilla gives the squares a warm, comforting flavor.
Salt: Just a pinch to balance the sweetness and bring out all the flavors.
Technique Tip for Perfect Pistachio Oat Squares
One of the most helpful tricks in Jessica’s Pistachio Oat Squares recipe is how to press the mixture evenly into the baking dish. Getting this step right makes sure your squares bake evenly and hold together nicely when you cut them. Here’s a simple way to do it:
- Start by greasing your baking dish well so the squares don’t stick.
- Scoop the mixture into the dish and spread it out with a spoon or spatula.
- Use the back of a spoon, or better yet, your clean hands, to press the mixture down firmly and evenly. Try to make the surface as flat as possible.
- If your hands get sticky, wet them with a little water to keep the mixture from sticking.
Pressing the mixture firmly helps the oats and pistachios stick together so the squares don’t fall apart after baking. It also helps the honey and peanut butter bind everything, giving you that perfect chewy texture. Plus, an even layer means the squares bake at the same speed, so you don’t end up with some parts burnt and others undercooked.
When I first made these, I didn’t press the mixture enough, and the squares crumbled when I tried to cut them. After that, I learned to really press down and even out the surface, and it made a huge difference. Now, I even use a piece of parchment paper on top to press the mixture down smoothly without getting sticky fingers all over the place. It’s a little trick that saves time and keeps things neat!
Suggested Side Dishes
Alternative Ingredients
rolled oats - Substitute with quinoa flakes: Quinoa flakes provide a similar texture and are a gluten-free alternative.
pistachios - Substitute with almonds: Almonds offer a similar crunch and nutty flavor, making them a good replacement.
honey - Substitute with maple syrup: Maple syrup has a comparable sweetness and consistency, suitable for binding the ingredients together.
peanut butter - Substitute with almond butter: Almond butter has a similar creamy texture and nutty taste, perfect for those with peanut allergies.
vanilla extract - Substitute with almond extract: Almond extract provides a different but complementary flavor profile.
salt - Substitute with sea salt: Sea salt can be used in the same quantity and offers a slightly different mineral content.
Alternative Recipes Similar to Pistachio Oat Squares
How to Store or Freeze Your Pistachio Oat Squares
Allow the pistachio oat squares to cool completely before storing. This ensures they maintain their texture and don't become soggy.
For short-term storage, place the squares in an airtight container. Layer them with parchment paper to prevent sticking. Store at room temperature for up to 5 days.
For longer storage, refrigerate the squares. Again, use an airtight container and parchment paper layers. They will stay fresh for up to 2 weeks in the fridge.
To freeze, wrap each square individually in plastic wrap. This prevents freezer burn and makes it easy to grab a single serving.
Place the individually wrapped squares in a freezer-safe bag or container. Label with the date for easy tracking. They can be frozen for up to 3 months.
When ready to enjoy, thaw the squares at room temperature for a few hours or overnight in the refrigerator. For a warm treat, heat in the microwave for 10-15 seconds.
If you prefer a crispier texture after freezing, reheat the squares in a preheated oven at 350°F (175°C) for about 5-10 minutes.
How to Reheat Leftovers
Oven Method:
- Preheat your oven to 300°F (150°C).
- Place the pistachio oat squares on a baking sheet lined with parchment paper.
- Cover them loosely with aluminum foil to prevent them from drying out.
- Heat for about 10-15 minutes or until they are warmed through.
- Let them cool slightly before enjoying.
Microwave Method:
- Place a pistachio oat square on a microwave-safe plate.
- Cover it with a damp paper towel to keep it moist.
- Microwave on medium power for 20-30 seconds.
- Check the temperature and heat in additional 10-second intervals if needed.
- Allow it to cool for a moment before eating.
Toaster Oven Method:
- Preheat your toaster oven to 300°F (150°C).
- Place the pistachio oat squares on the toaster oven tray.
- Cover them with a piece of aluminum foil.
- Heat for 8-10 minutes or until they are warmed through.
- Let them cool slightly before serving.
Stovetop Method:
- Heat a non-stick skillet over low heat.
- Place the pistachio oat squares in the skillet.
- Cover the skillet with a lid to create a gentle steam.
- Heat for about 5 minutes, flipping halfway through, until warmed.
- Allow them to cool slightly before enjoying.
Essential Tools for Making Pistachio Oat Squares
Oven: Used to bake the oat squares at the specified temperature of 350°F (175°C).
Mixing bowl: Essential for combining all the ingredients like oats, chopped pistachios, honey, peanut butter, vanilla extract, and salt.
Baking dish: The container where the mixture is pressed into before baking.
Spatula: Useful for mixing the ingredients thoroughly and for pressing the mixture evenly into the baking dish.
Measuring cups: Necessary for accurately measuring the oats, pistachios, honey, and peanut butter.
Measuring spoons: Needed to measure the vanilla extract and salt precisely.
Knife: Used to chop the pistachios before adding them to the mixture.
Cutting board: Provides a safe surface for chopping the pistachios.
Cooling rack: Allows the baked oat squares to cool evenly before cutting.
Grease or cooking spray: Used to grease the baking dish to prevent the mixture from sticking.
Time-Saving Tips for Making Pistachio Oat Squares
Prepare ingredients in advance: Measure and chop pistachios and oats the night before to save time.
Use a food processor: Quickly combine oats, pistachios, honey, and peanut butter in a food processor for a smoother mix.
Line the baking dish: Use parchment paper instead of greasing the dish to make cleanup faster.
Microwave the peanut butter: Warm peanut butter in the microwave for easier mixing with honey.
Cool quickly: Place the baked dish in the fridge to speed up the cooling process before cutting into squares.
Jessica's Pistachio Oat Squares Recipe
Ingredients
Main Ingredients
- 2 cups Rolled oats
- 1 cup Pistachios, chopped
- ½ cup Honey
- ½ cup Peanut butter
- 1 teaspoon Vanilla extract
- ¼ teaspoon Salt
Instructions
- Preheat your oven to 350°F (175°C).
- In a mixing bowl, combine oats, chopped pistachios, honey, peanut butter, vanilla extract, and salt.
- Press the mixture into a greased baking dish.
- Bake for 25-30 minutes or until golden brown.
- Let it cool before cutting into squares.
Nutritional Value
Keywords
More Amazing Recipes to Try 🙂
- Bloody Mary Mix Recipe10 Minutes
- Clam Sauce Recipe30 Minutes
- Dipping Sauce for Ahi Tuna Recipe5 Minutes
- Peruvian Aji Style Sauce Recipe10 Minutes
- Lobster Sauce for Mashed Potatoes Recipe30 Minutes
- Sweet and Sour Tamarind Sauce Recipe20 Minutes
- Veggie Omelet Recipe20 Minutes
- Arbys Sauce Recipe15 Minutes
Leave a Reply