
I love making lemon pancakes because they bring a fresh, bright flavor to a classic breakfast. They’re perfect for a weekend morning when you want something a little special but still easy to make. I think you’ll enjoy how the lemon zest and juice add a nice twist that feels light and tasty.
Most of the ingredients in this recipe are common pantry staples, but you might want to check for buttermilk if you don’t usually have it at home. It’s a little tangy and helps make the pancakes fluffy and tender. Fresh lemons are also important here since the zest and juice give the pancakes their bright flavor. If you can’t find fresh lemons, bottled lemon juice can work, but fresh is best.
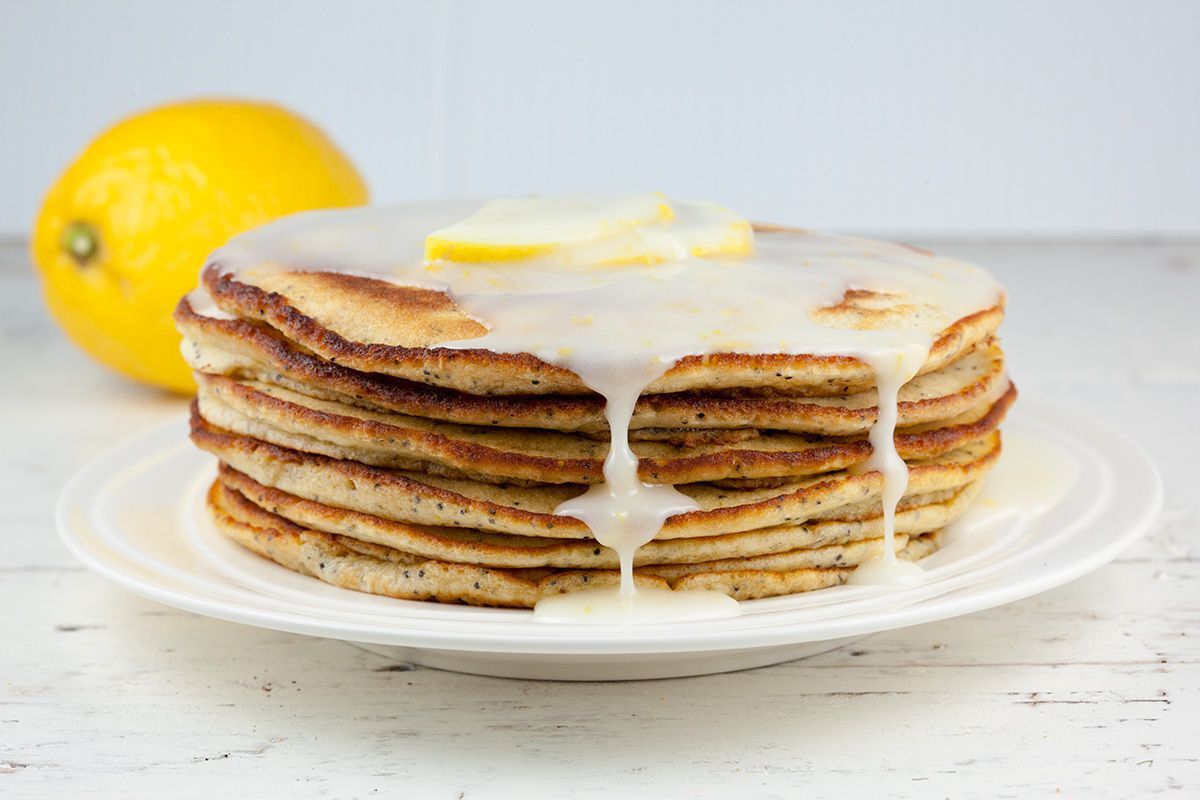
Ingredients For Lemon Pancakes Recipe
All-purpose flour: The main base for the pancakes that gives them structure.
Sugar: Adds a touch of sweetness to balance the lemon.
Baking powder: A leavening agent that helps the pancakes rise and become fluffy.
Baking soda: Works with the buttermilk to create bubbles and lightness.
Salt: Enhances the flavors and balances the sweetness.
Buttermilk: Adds moisture and a slight tang, making the pancakes soft.
Egg: Binds the ingredients together and adds richness.
Melted butter: Adds flavor and keeps the pancakes tender.
Lemon zest: The outer peel of the lemon, packed with bright citrus flavor.
Lemon juice: Adds fresh acidity that makes the pancakes lively and refreshing.
Technique Tip for Making Pancakes
One of the most important steps in this Lemon Pancakes Recipe is mixing the wet and dry ingredients just right. When you pour the wet ingredients into the dry ones, you want to stir them until they’re just combined. That means you stop mixing as soon as you don’t see big patches of flour anymore. Here’s how to do it:
- Use a spoon or a spatula to gently fold the wet and dry ingredients together.
- Stir slowly and carefully, scraping the sides and bottom of the bowl.
- Stop mixing as soon as the batter looks mostly smooth but still a little lumpy.
Why does this matter? If you mix too much, the gluten in the flour gets worked up and makes the pancakes tough and chewy instead of soft and fluffy. A little lumpiness in the batter is totally okay—it actually helps keep the pancakes light and tender.
When I first made these pancakes, I kept stirring and stirring because I thought the batter had to be perfectly smooth. But that just made the pancakes dense and not as tasty. Now, I remind myself to stop mixing early, and the pancakes turn out way better. Also, if you see lumps, don’t worry—they’ll cook out just fine on the griddle.
So, next time you’re mixing pancake batter, think of it like this: gentle folding, not heavy stirring. It makes the whole cooking process smoother and the pancakes more delicious. Plus, it saves you from washing an extra bowl because you won’t have to remix or fix the batter!
Suggested Side Dishes
Alternative Ingredients
all-purpose flour - Substitute with whole wheat flour: Whole wheat flour adds more fiber and nutrients, though it may make the pancakes slightly denser.
sugar - Substitute with honey: Honey provides a natural sweetness and adds a bit of moisture to the batter.
baking powder - Substitute with self-rising flour: Self-rising flour already contains baking powder and salt, so adjust the recipe accordingly.
baking soda - Substitute with additional baking powder: Use 2-3 times more baking powder than the amount of baking soda required.
salt - Substitute with sea salt: Sea salt can be used in the same quantity and may add a slightly different flavor profile.
buttermilk - Substitute with plain yogurt: Plain yogurt provides the same tangy flavor and acidity needed for the recipe.
large egg - Substitute with flaxseed meal and water: Mix 1 tablespoon flaxseed meal with 3 tablespoon water to replace one egg, making it vegan-friendly.
melted butter - Substitute with coconut oil: Coconut oil provides a similar fat content and adds a subtle coconut flavor.
freshly grated lemon zest - Substitute with lemon extract: Use a few drops of lemon extract to provide the lemon flavor without the zest.
freshly squeezed lemon juice - Substitute with bottled lemon juice: Bottled lemon juice can be used in the same quantity, though fresh is always preferred for better flavor.
Other Alternative Recipes Similar to This
How to Store or Freeze Your Pancakes
Allow the lemon pancakes to cool completely on a wire rack. This prevents them from becoming soggy when stored.
Once cooled, place a sheet of parchment paper between each pancake. This ensures they don't stick together, making it easier to grab one or two without defrosting the entire batch.
Stack the pancakes in an airtight container or a resealable plastic bag. If using a bag, try to remove as much air as possible before sealing to maintain freshness.
Label the container or bag with the date. Lemon pancakes can be stored in the refrigerator for up to 3 days or in the freezer for up to 2 months.
When ready to enjoy, reheat the pancakes. For refrigerated pancakes, use a microwave or toaster. For frozen pancakes, you can either thaw them overnight in the refrigerator or reheat directly from frozen.
To reheat in the microwave, place the pancakes on a microwave-safe plate and cover with a damp paper towel. Heat on high for 20-30 seconds for refrigerated pancakes or 60-90 seconds for frozen ones.
To reheat in the toaster, place the pancakes directly in the toaster slots and toast on a low setting until warmed through. This method gives them a slightly crispy edge, enhancing the texture.
For a more even reheating, you can use an oven. Preheat the oven to 350°F (175°C). Place the lemon pancakes on a baking sheet in a single layer and cover with aluminum foil. Heat for about 10 minutes if refrigerated or 15-20 minutes if frozen.
Serve the reheated pancakes with your favorite toppings, such as fresh berries, maple syrup, or a dollop of whipped cream. Enjoy the burst of lemon zest flavor as if they were freshly made!
How to Reheat Leftovers
Oven Method: Preheat your oven to 350°F (175°C). Place the lemon pancakes on a baking sheet in a single layer. Cover them with aluminum foil to prevent drying out. Heat for about 10 minutes or until warmed through. This method helps maintain the pancakes' fluffy texture.
Microwave Method: Place the lemon pancakes on a microwave-safe plate. Cover them with a damp paper towel to keep them moist. Microwave on high for 20-30 seconds per pancake. Check and add more time if needed, but be careful not to overheat, as this can make them rubbery.
Toaster Method: If you like your lemon pancakes a bit crispy, use a toaster. Simply place each pancake in the toaster and toast on a low setting. Keep an eye on them to avoid burning. This method is quick and adds a nice crisp edge.
Skillet Method: Heat a non-stick skillet over medium-low heat. Add a small amount of butter or oil to the skillet. Place the lemon pancakes in the skillet and heat for about 1-2 minutes on each side until warmed through. This method can help revive the original texture and flavor.
Steaming Method: If you have a steamer basket, this is a gentle way to reheat lemon pancakes. Place the pancakes in the steamer basket over simmering water. Cover and steam for about 2-3 minutes. This method keeps the pancakes moist and fluffy.
Best Tools for This Recipe
Mixing bowl: A large bowl used to combine the dry ingredients and another for the wet ingredients.
Whisk: Essential for thoroughly mixing the dry ingredients and for combining the wet ingredients smoothly.
Griddle: A flat cooking surface heated over medium heat, perfect for cooking pancakes evenly.
Skillet: An alternative to a griddle, used for cooking pancakes if a griddle is not available.
Measuring cups: Used to accurately measure the flour, buttermilk, and other ingredients.
Measuring spoons: Necessary for measuring smaller quantities like sugar, baking powder, baking soda, salt, lemon zest, and lemon juice.
Spatula: Used to flip the pancakes once bubbles form and the edges are set.
Grater: Used to freshly grate the lemon zest.
Juicer: Handy for squeezing fresh lemon juice.
Basting brush: Useful for lightly greasing the griddle or skillet before cooking the pancakes.
How to Save Time on Making Pancakes
Prepare ingredients in advance: Measure and mix all dry ingredients the night before. Store them in an airtight container.
Use a griddle: A griddle allows you to cook multiple pancakes at once, saving time.
Preheat the skillet: Ensure your skillet is hot before adding the batter to speed up cooking.
Batch cook: Make extra pancakes and freeze them. Reheat in the toaster for a quick breakfast.
Simplify toppings: Use ready-made syrups or fruit preserves to save time on preparation.
Lemon Pancakes
Ingredients
Main Ingredients
- 1 cup All-purpose flour
- 2 tablespoon Sugar
- 1 teaspoon Baking powder
- ½ teaspoon Baking soda
- ¼ teaspoon Salt
- 1 cup Buttermilk
- 1 Egg large
- 2 tablespoon Butter melted
- 1 tablespoon Lemon zest freshly grated
- 2 tablespoon Lemon juice freshly squeezed
Instructions
- In a large mixing bowl, whisk together the flour, sugar, baking powder, baking soda, and salt.
- In another bowl, whisk together the buttermilk, egg, melted butter, lemon zest, and lemon juice.
- Pour the wet ingredients into the dry ingredients and stir until just combined. Do not overmix.
- Heat a griddle or skillet over medium heat and lightly grease it. Pour ¼ cup of batter for each pancake onto the griddle.
- Cook until bubbles form on the surface of the pancakes and the edges look set, about 2-3 minutes. Flip and cook until golden brown on the other side, about 1-2 minutes more.
- Serve warm with your favorite toppings.
Nutritional Value
Keywords
More Amazing Recipes to Try 🙂
- Pickled Watermelon Rinds Recipe30 Minutes
- Cocktail Sauce Recipe5 Minutes
- Mexican Sopes Recipe40 Minutes
- Traditional Mexican Street Tacos Recipe30 Minutes
- Eggless French Toast Recipe20 Minutes
- Traditional Gyro Meat Recipe1 Hours 20 Minutes
- Sea Scallops and Angel Hair Pasta Recipe30 Minutes
- Swedish Glogg Recipe40 Minutes


Leave a Reply