
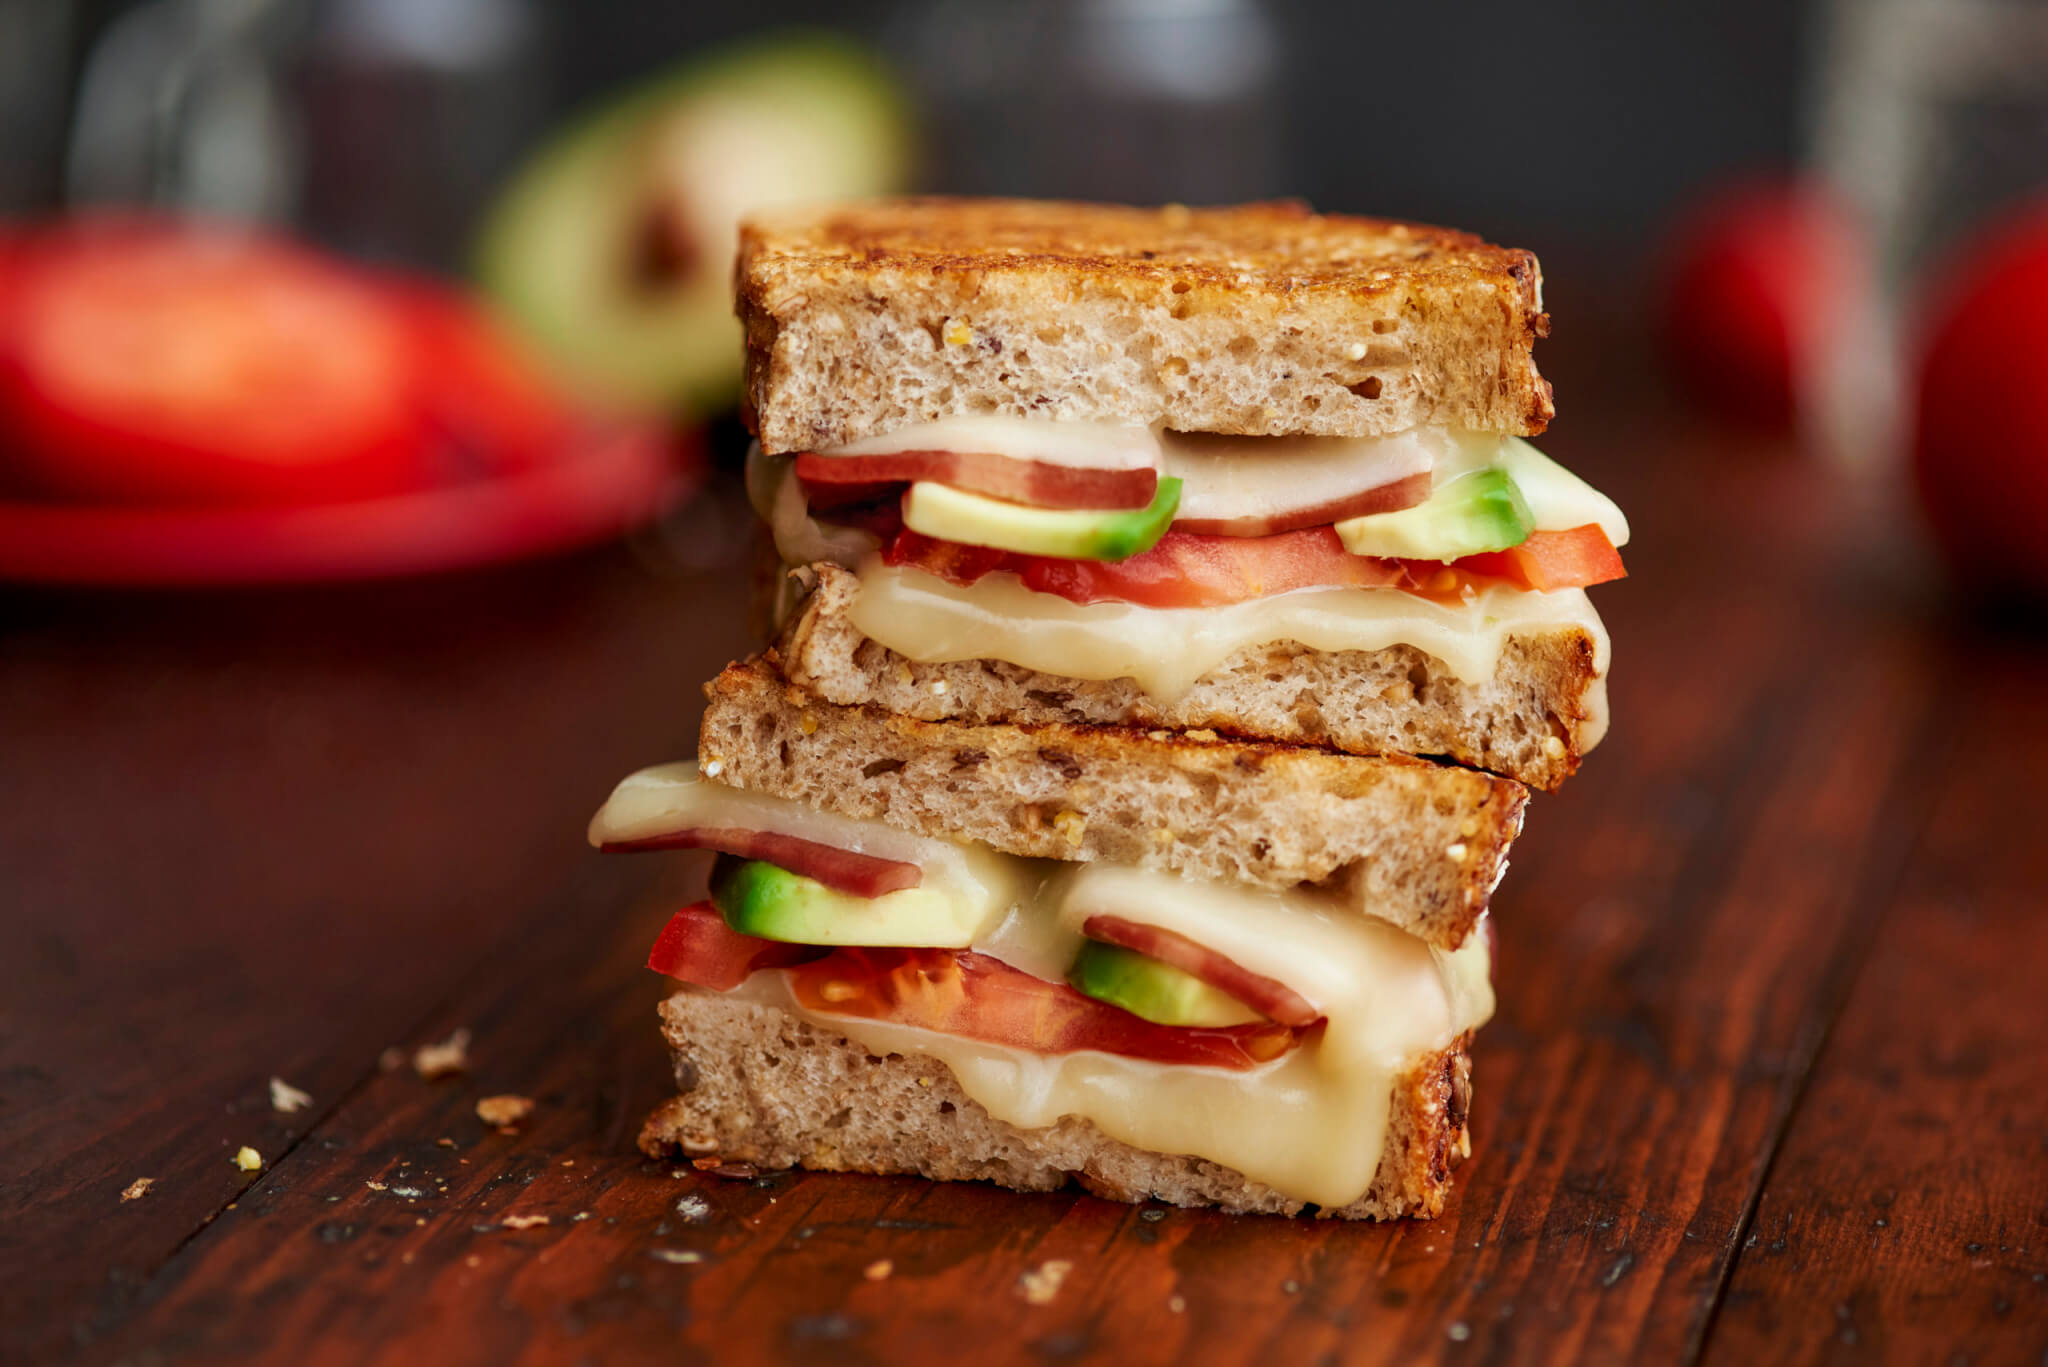
I love this grilled cheese de mayo recipe because it makes a simple sandwich taste extra special with just a little twist. It’s one of those easy meals that feels cozy and delicious, perfect for any time you want something warm and cheesy. I can’t wait for you to try it and see how mayo on the bread changes everything!
Most of the ingredients in this recipe are probably already in your kitchen, like bread and cheese. The only thing you might want to check for at the supermarket is mayonnaise, if you don’t usually keep it around. It’s a common item but make sure to pick a good quality one since it adds a lot of flavor and helps get the bread nice and crispy.
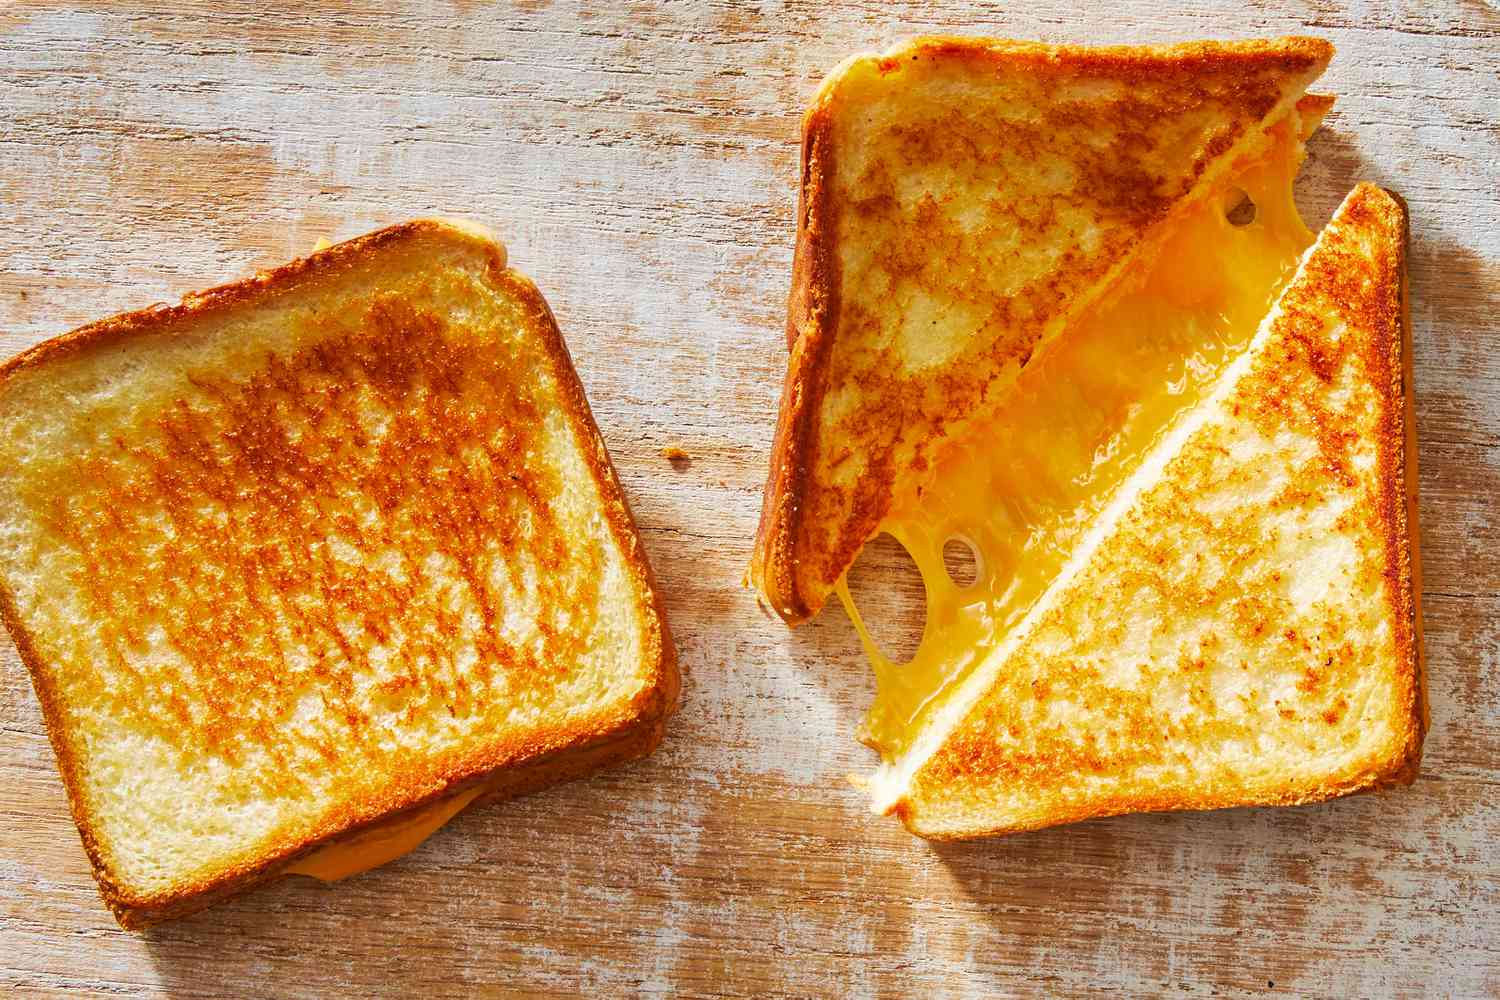
Ingredients For Grilled Cheese De Mayo Recipe
BREAD: Any type of bread works well here, whether it’s white, whole wheat, or something a bit more special like sourdough. It’s the base that holds everything together.
CHEDDAR OR AMERICAN CHEESE: These cheeses melt nicely and give that classic grilled cheese flavor. You can choose whichever you like best.
MAYONNAISE: This is spread on the outside of the bread instead of butter. It helps the bread get golden and crispy while adding a subtle tang.
Technique Tip for This Recipe
One of the most important steps in making your Grilled Cheese de Mayo is getting the bread perfectly golden brown without burning it. Here’s how you can do that:
- Use medium heat on your skillet. If the heat is too high, the bread will burn before the cheese melts. If it’s too low, the bread won’t get that nice crispy texture.
- Spread the mayonnaise evenly on the bread. This not only helps the bread brown nicely but also adds a little extra flavor and keeps it from sticking to the pan.
- Place the bread mayo side down in the skillet and let it cook without moving it around. This helps the bread develop a nice crust.
- After about 4-5 minutes, check the bread. If it’s golden brown, carefully flip the sandwich to cook the other side. Use a spatula to help with the flip so the sandwich stays together.
- Cook the second side for another 4-5 minutes until it’s golden and the cheese inside is melted and gooey.
Doing this step right makes your grilled cheese taste so much better because you get that perfect crunch on the outside and melty cheese on the inside. If you rush it or use too high heat, you might end up with burnt bread and cold cheese, which is a bummer.
I remember the first time I tried this, I turned the heat up too high because I was impatient. The bread got black really fast, and the cheese was barely melted. Now, I always remind myself to be patient and let the heat do its job. Also, spreading mayonnaise instead of butter is a little trick I love—it browns beautifully and adds a subtle tang that makes the sandwich extra tasty. Give it a try!
Suggested Side Dishes
Alternative Ingredients
bread - Substitute with sourdough: Sourdough adds a tangy flavor and a chewy texture that complements the cheese well.
bread - Substitute with whole grain bread: Whole grain bread provides more fiber and nutrients, making the sandwich healthier.
cheddar cheese - Substitute with mozzarella cheese: Mozzarella melts beautifully and has a mild flavor that pairs well with various breads.
cheddar cheese - Substitute with Swiss cheese: Swiss cheese offers a nutty and slightly sweet flavor, adding a unique twist to the sandwich.
american cheese - Substitute with provolone cheese: Provolone has a mild, slightly smoky flavor that enhances the overall taste of the sandwich.
american cheese - Substitute with havarti cheese: Havarti is creamy and buttery, making it an excellent melting cheese for grilled sandwiches.
mayonnaise - Substitute with butter: Butter gives a rich, savory flavor and helps achieve a crispy, golden-brown crust.
mayonnaise - Substitute with olive oil: Olive oil provides a healthier fat option and adds a subtle, fruity flavor to the sandwich.
Other Alternative Recipes Similar to This Dish
How to Store / Freeze This Recipe
- Allow the grilled cheese sandwiches to cool completely before storing. This prevents condensation, which can make the bread soggy.
- Wrap each sandwich individually in plastic wrap or aluminum foil. This helps maintain freshness and prevents the sandwiches from sticking together.
- Place the wrapped sandwiches in an airtight container or a zip-top bag. Label the container or bag with the date to keep track of freshness.
- Store the sandwiches in the refrigerator if you plan to eat them within 2-3 days. For longer storage, place them in the freezer where they can last up to 1-2 months.
- To reheat, remove the sandwich from the wrapping. For refrigerated sandwiches, heat in a skillet over medium heat for 2-3 minutes per side until the bread is crispy and the cheese is melted. For frozen sandwiches, thaw in the refrigerator overnight before reheating in a skillet.
- Alternatively, you can reheat the sandwiches in a toaster oven or conventional oven at 350°F (175°C) for about 10 minutes, or until the bread is crispy and the cheese is melted.
How to Reheat Leftovers
Preheat your oven to 350°F. Place the grilled cheese on a baking sheet and cover it loosely with aluminum foil. Bake for about 10 minutes, or until the cheese is melted and the bread is crispy.
Use a skillet over medium heat. Place the grilled cheese in the skillet and cover it with a lid. Heat for about 2-3 minutes on each side, or until the cheese is melted and the bread is golden brown.
For a quick method, use a toaster oven. Set it to medium heat and place the grilled cheese directly on the rack. Toast for about 5 minutes, or until the cheese is melted and the bread is crispy.
If you're in a hurry, use the microwave. Place the grilled cheese on a microwave-safe plate and cover it with a damp paper towel. Microwave on medium power for about 30 seconds to 1 minute, checking frequently to avoid sogginess.
Best Tools for This Recipe
Skillet: A flat-bottomed pan used for cooking the sandwiches evenly on both sides.
Spatula: A tool used to flip the sandwiches without breaking the bread or losing the cheese.
Knife: Used to spread the mayonnaise evenly on the bread slices.
Cutting board: A surface to place the bread while spreading mayonnaise and assembling the sandwiches.
Plate: For serving the grilled cheese sandwiches once they are cooked.
Measuring spoons: To accurately measure the mayonnaise needed for the recipe.
How to Save Time on Making This Recipe
Preheat the skillet: Preheat your skillet while you prepare the ingredients to save time.
Use pre-sliced cheese: Opt for pre-sliced cheese to avoid the hassle of slicing and ensure even melting.
Assemble in advance: Assemble the sandwiches ahead of time and store them in the fridge until ready to cook.
Cook multiple sandwiches: Use a large skillet or griddle to cook multiple grilled cheese sandwiches at once.
Cover the skillet: Cover the skillet with a lid to help the cheese melt faster.
Grilled Cheese de Mayo
Ingredients
Main Ingredients
- 4 slices Bread Any type you like
- 4 slices Cheese Cheddar or American
- 2 tablespoon Mayonnaise Divided
Instructions
- 1. Spread 1 tablespoon of mayonnaise on one side of each slice of bread.
- 2. Place two slices of bread, mayo side down, in a skillet over medium heat.
- 3. Add cheese slices on top of the bread in the skillet.
- 4. Top with the remaining slices of bread, mayo side up.
- 5. Cook until the bread is golden brown and the cheese is melted, about 4-5 minutes per side.
- 6. Serve hot and enjoy!
Nutritional Value
Keywords
More Amazing Recipes to Try 🙂
- Spicy Seafood Sauce Recipe30 Minutes
- Veggie Spring Rolls with Mango Dipping Sauce Recipe30 Minutes
- Pickled Watermelon Rinds Recipe30 Minutes
- Cocktail Sauce Recipe5 Minutes
- Mexican Sopes Recipe40 Minutes
- Traditional Mexican Street Tacos Recipe30 Minutes
- Eggless French Toast Recipe20 Minutes
- Traditional Gyro Meat Recipe1 Hours 20 Minutes






Leave a Reply