
I love how simple and fresh this garlic swiss chard recipe is. It’s one of those dishes that feels healthy but still tastes really comforting. I hope you enjoy making it as much as I do—it’s a great way to add some green goodness to your meal.
Swiss chard might not be something you see every day in your kitchen, but it’s usually easy to find at most supermarkets, especially in the produce section. When you pick it out, look for bright, crisp leaves without any yellow spots. The garlic, olive oil, salt, and pepper are probably already in your pantry, so this recipe is mostly about getting that fresh swiss chard ready to shine.
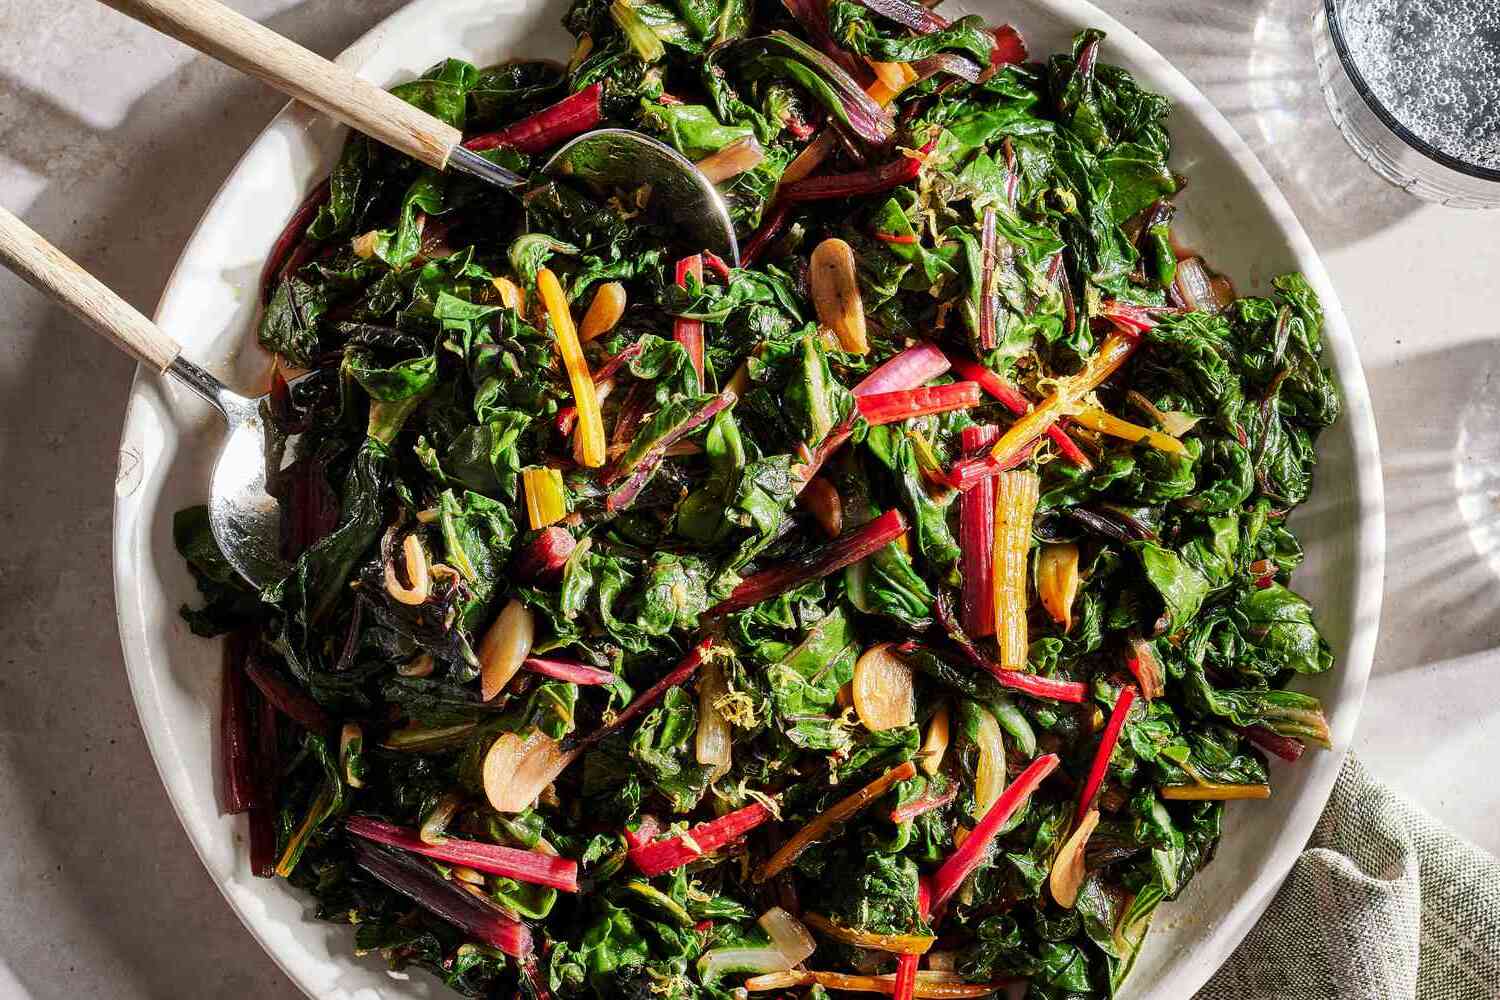
Ingredients For Garlic Swiss Chard Recipe
Swiss chard: A leafy green vegetable with a slightly earthy flavor and colorful stems, packed with vitamins and minerals.
Garlic: Adds a strong, savory aroma and taste that makes the dish flavorful.
Olive oil: Used for sautéing, it adds a smooth texture and rich taste.
Salt: Enhances the natural flavors of the ingredients.
Black pepper: Adds a mild heat and depth to the dish.
Technique Tip for This Recipe
One of the most important steps in this Garlic Swiss Chard Recipe is sautéing the garlic just right. When you heat the olive oil and add the minced garlic, you want to cook it until it’s fragrant, which usually takes about a minute. Here’s how to do it without burning the garlic:
- Heat the olive oil over medium heat—not too hot, or the garlic will burn quickly.
- Add the minced garlic and stir it gently.
- Keep an eye on it and stir often so it cooks evenly.
- When you start to smell that lovely garlic aroma, it’s time to add the swiss chard.
Doing this makes the garlic taste sweet and mild instead of bitter or burnt. Burnt garlic can make the whole dish taste harsh, so this step really helps the flavors stay balanced and yummy.
I remember the first time I tried this, I got distracted and let the garlic cook too long. It turned dark brown and tasted bitter, which was a bummer. Now, I always keep the heat medium and watch it closely. Also, if you want to save time, you can mince the garlic in advance and keep it in the fridge for a day or two. That way, you’re ready to go when you start cooking.
Sautéing the garlic just right is a small trick that makes a big difference in this simple, tasty Garlic Swiss Chard dish!
Suggested Side Dishes
Alternative Ingredients
swiss chard - Substitute with kale: Kale has a similar texture and slightly bitter taste that works well in place of swiss chard.
swiss chard - Substitute with spinach: Spinach is more tender and has a milder flavor, but it can be used as a substitute if you prefer a softer texture.
garlic - Substitute with shallots: Shallots provide a milder, sweeter flavor that can complement the dish if garlic is not available.
garlic - Substitute with garlic powder: Garlic powder can be used in place of fresh garlic, though the flavor will be less intense. Use about ¼ teaspoon for each clove of garlic.
olive oil - Substitute with avocado oil: Avocado oil has a similar smoke point and a neutral flavor, making it a good substitute for olive oil.
olive oil - Substitute with coconut oil: Coconut oil can be used if you don't mind a slight coconut flavor in your dish.
salt - Substitute with soy sauce: Soy sauce can add a salty and umami flavor to the dish, but use it sparingly to avoid overpowering the other ingredients.
salt - Substitute with sea salt: Sea salt can be used in place of regular table salt for a slightly different mineral flavor.
black pepper - Substitute with white pepper: White pepper has a similar heat but a slightly different flavor profile, which can add a unique twist to the dish.
black pepper - Substitute with red pepper flakes: Red pepper flakes can add a bit of heat and a different type of spiciness to the dish. Use sparingly to avoid making it too spicy.
Other Alternative Recipes Similar to This Dish
How to Store / Freeze This Dish
- Allow the garlic swiss chard to cool completely before storing. This helps to prevent condensation, which can make the vegetables soggy.
- Transfer the cooled swiss chard to an airtight container or a resealable plastic bag. Ensure you squeeze out as much air as possible to maintain freshness.
- Store the container or bag in the refrigerator. The garlic swiss chard will keep well for up to 3-4 days.
- For longer storage, consider freezing. Spread the cooked swiss chard on a baking sheet in a single layer and place it in the freezer for about 1-2 hours. This step, known as flash freezing, prevents the chard from clumping together.
- Once the swiss chard is frozen, transfer it to a freezer-safe bag or container. Label the container with the date to keep track of its freshness.
- When ready to use, thaw the frozen swiss chard in the refrigerator overnight or reheat directly from frozen in a skillet over medium heat until warmed through.
- To retain the best flavor and texture, use the frozen garlic swiss chard within 2-3 months.
How to Reheat Leftovers
Stovetop Method:
- Heat a skillet over medium heat.
- Add a splash of olive oil or a small amount of butter.
- Add the leftover garlic swiss chard to the skillet.
- Stir occasionally until heated through, about 3-5 minutes.
Microwave Method:
- Place the garlic swiss chard in a microwave-safe dish.
- Cover with a microwave-safe lid or plastic wrap with a small vent.
- Microwave on high for 1-2 minutes, stirring halfway through.
- Check if heated through; if not, continue in 30-second intervals.
Oven Method:
- Preheat your oven to 350°F (175°C).
- Place the garlic swiss chard in an oven-safe dish.
- Cover with aluminum foil to prevent drying out.
- Heat in the oven for about 10-15 minutes, or until warmed through.
Steaming Method:
- Set up a steamer basket over a pot of simmering water.
- Place the garlic swiss chard in the steamer basket.
- Cover and steam for about 3-5 minutes, or until heated through.
Air Fryer Method:
- Preheat the air fryer to 350°F (175°C).
- Place the garlic swiss chard in the air fryer basket.
- Heat for 3-5 minutes, shaking the basket halfway through to ensure even heating.
Best Tools for This Recipe
Large skillet: A broad, flat-bottomed pan used for sautéing the garlic and cooking the swiss chard evenly.
Chef's knife: A versatile knife used for chopping the swiss chard and mincing the garlic.
Cutting board: A sturdy surface to safely chop the swiss chard and mince the garlic.
Measuring spoons: Tools used to measure the olive oil, salt, and black pepper accurately.
Wooden spoon: A utensil for stirring the garlic and swiss chard while cooking.
Colander: A tool to wash and drain the swiss chard before chopping.
Garlic press: An optional tool to easily mince the garlic cloves.
Serving dish: A dish to present the cooked swiss chard when serving.
How to Save Time on Making This Recipe
Prep ingredients in advance: Wash and chop the swiss chard and mince the garlic ahead of time to streamline the cooking process.
Use pre-minced garlic: Save time by using store-bought pre-minced garlic instead of mincing it yourself.
Cook in batches: If you have a small skillet, cook the swiss chard in batches to ensure even wilting and faster cooking.
Multitask: While the garlic is sautéing, measure out your salt and black pepper to have them ready for seasoning.
Garlic Swiss Chard Recipe
Ingredients
Main Ingredients
- 1 bunch Swiss chard washed and chopped
- 3 cloves Garlic minced
- 2 tablespoon Olive oil
- 0.5 teaspoon Salt or to taste
- 0.25 teaspoon Black pepper or to taste
Instructions
- 1. Heat olive oil in a large skillet over medium heat.
- 2. Add minced garlic and sauté until fragrant, about 1 minute.
- 3. Add chopped Swiss chard to the skillet and cook, stirring occasionally, until wilted, about 5-7 minutes.
- 4. Season with salt and black pepper to taste. Serve warm.
Nutritional Value
Keywords
More Amazing Recipes to Try 🙂
- Sincronizada Recipe15 Minutes
- Bloody Mary Mix Recipe10 Minutes
- Clam Sauce Recipe30 Minutes
- Dipping Sauce for Ahi Tuna Recipe5 Minutes
- Peruvian Aji Style Sauce Recipe10 Minutes
- Lobster Sauce for Mashed Potatoes Recipe30 Minutes
- Sweet and Sour Tamarind Sauce Recipe20 Minutes
- Veggie Omelet Recipe20 Minutes
Leave a Reply