
I love making this homemade cherry pie because it reminds me of cozy family gatherings and the sweet smell of fresh fruit baking in the oven. It’s a simple recipe that feels special, and I’m excited for you to try it and enjoy every bite.
Most of the ingredients in this recipe are common pantry staples, but if you don’t usually keep cornstarch on hand, it’s a good idea to pick some up at the supermarket. Cornstarch helps thicken the cherry filling so it’s not too runny. Also, fresh cherries are great when in season, but frozen cherries work just as well and are easier to find year-round.
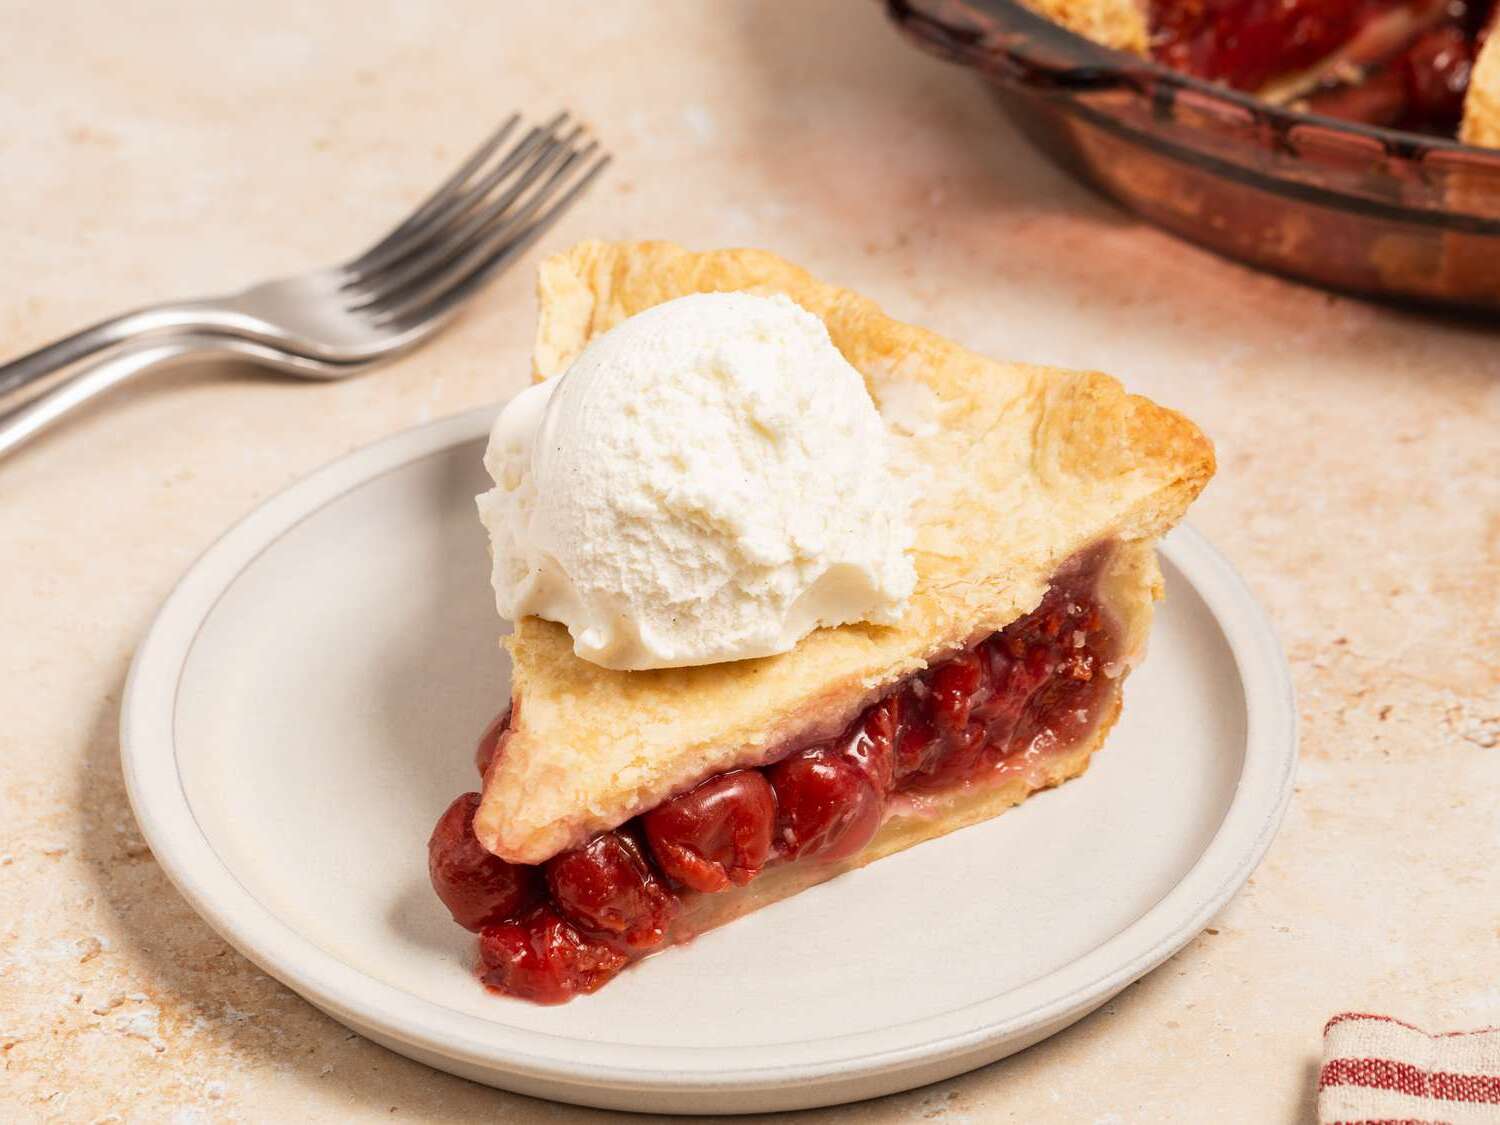
Ingredients For Homemade Cherry Pie Recipe
ALL-PURPOSE FLOUR: This is the base for the pie crust, giving it structure and a tender texture.
UNSALTED BUTTER: Cold butter cut into cubes helps create a flaky crust when mixed with the flour.
ICE WATER: Added little by little to bring the dough together without making it too sticky.
CHERRIES: Fresh or frozen, these are the star of the pie, providing juicy sweetness and tartness.
GRANULATED SUGAR: Sweetens the cherry filling to balance the tart flavor.
CORNSTARCH: Thickens the cherry filling so it holds together nicely when baked.
LEMON JUICE: Adds a bit of brightness and helps enhance the cherry flavor.
VANILLA EXTRACT: Gives a warm, sweet aroma that makes the filling taste even better.
Technique Tip for Cherry Pie
One of the trickiest parts of making a pie is getting the crust just right, especially when you’re mixing the butter into the flour. Here’s a simple way to do it so your pie crust turns out flaky and delicious every time:
- Start with cold butter that’s cut into small cubes. Cold butter helps create little pockets of fat in the dough, which makes the crust flaky.
- Put the flour and butter cubes in a bowl. Use a pastry cutter if you have one, or just your fingers, to mix them together. The goal is to break the butter into tiny pieces coated with flour, so the mixture looks like coarse crumbs.
- Be careful not to overwork the dough. If you mash the butter too much, the crust can get tough instead of flaky.
- Add ice-cold water a little bit at a time—just a tablespoon—to bring the dough together. Stop adding water as soon as the dough holds its shape when you press it.
- Once the dough is ready, shape it into discs, wrap them up, and chill in the fridge. This resting time helps the butter firm up again and the flour to relax, which makes rolling out the dough easier.
Doing this makes the pie crust flaky and tender, which is the best part of a cherry pie. When I first tried this, I added too much water and ended up with a sticky dough that was hard to roll out. Now, I add water slowly and stop as soon as it sticks together—that little pause makes all the difference. Plus, chilling the dough is a step I never skip because it keeps everything nice and cool, so the crust bakes up perfectly golden and crisp.
Suggested Side Dishes
Alternative Ingredients
all-purpose flour - Substitute with whole wheat flour: Whole wheat flour adds a nutty flavor and more fiber, though it may make the crust denser.
unsalted butter - Substitute with margarine: Margarine can be used for a dairy-free option, though it may alter the flavor slightly.
ice water - Substitute with cold milk: Cold milk can add a bit more richness to the dough.
pitted fresh or frozen cherries - Substitute with canned cherries: Canned cherries can be used when fresh or frozen cherries are not available, though they may be sweeter and softer.
granulated sugar - Substitute with coconut sugar: Coconut sugar has a lower glycemic index and adds a slight caramel flavor.
cornstarch - Substitute with tapioca starch: Tapioca starch can thicken the filling similarly to cornstarch and is a good gluten-free option.
freshly squeezed lemon juice - Substitute with apple cider vinegar: Apple cider vinegar can provide a similar acidity to balance the sweetness of the cherries.
vanilla extract - Substitute with almond extract: Almond extract pairs well with cherries and can add a different but complementary flavor.
Alternative Recipes Similar to Cherry Pie
How to Store or Freeze Your Cherry Pie
- Allow the cherry pie to cool completely at room temperature before storing. This helps to set the filling and prevents condensation from making the crust soggy.
- For short-term storage, cover the pie loosely with aluminum foil or plastic wrap and keep it at room temperature for up to 2 days. If you prefer a chilled pie, you can store it in the refrigerator for up to 4 days.
- To freeze the cherry pie, first ensure it is completely cooled. Wrap the entire pie tightly in plastic wrap, followed by a layer of aluminum foil to prevent freezer burn. Label with the date and freeze for up to 3 months.
- When ready to enjoy a frozen pie, thaw it in the refrigerator overnight. For a freshly baked taste, reheat the pie in a preheated oven at 375°F (190°C) for about 20-25 minutes or until warmed through and the crust is crisp.
- If you prefer to freeze the pie before baking, assemble the pie as directed but do not bake it. Wrap the unbaked pie tightly in plastic wrap and aluminum foil. When ready to bake, do not thaw. Instead, bake directly from the freezer, adding an additional 15-20 minutes to the baking time.
- For individual servings, slice the cherry pie and place each slice on a parchment-lined baking sheet. Freeze until solid, then wrap each slice in plastic wrap and store in a freezer-safe bag. This allows you to thaw and enjoy single servings as desired.
- To maintain the best texture and flavor, avoid refreezing the cherry pie once it has been thawed.
How to Reheat Leftovers
Oven Method:
- Preheat your oven to 350°F (175°C).
- Place the leftover cherry pie on a baking sheet to catch any drips.
- Cover the pie loosely with aluminum foil to prevent the crust from over-browning.
- Heat for about 15-20 minutes, or until the filling is warmed through.
- Remove the foil for the last 5 minutes to crisp up the crust.
Microwave Method:
- Place a slice of cherry pie on a microwave-safe plate.
- Cover the pie with a microwave-safe cover to avoid splatters.
- Heat on medium power for 1-2 minutes, checking every 30 seconds to ensure it doesn't overheat.
- Let it sit for a minute before serving to allow the filling to settle.
Toaster Oven Method:
- Preheat your toaster oven to 350°F (175°C).
- Place the cherry pie slice on a piece of parchment paper or directly on the toaster oven tray.
- Heat for 10-15 minutes, checking periodically to ensure the crust doesn't burn.
- If the crust starts to brown too quickly, cover it with a small piece of aluminum foil.
Stovetop Skillet Method:
- Preheat a non-stick skillet over low heat.
- Place the cherry pie slice in the skillet.
- Cover the skillet with a lid to create a mini-oven effect.
- Heat for about 5-7 minutes, checking frequently to ensure the crust doesn't burn.
- This method helps to keep the crust crispy while warming the filling evenly.
Air Fryer Method:
- Preheat your air fryer to 320°F (160°C).
- Place the cherry pie slice in the air fryer basket.
- Heat for 5-7 minutes, checking halfway through to ensure even heating.
- This method is great for maintaining a crispy crust while warming the filling thoroughly.
Essential Tools for Baking Cherry Pie
Oven: Used to bake the pie at a consistent temperature of 375°F (190°C).
Mixing bowl: Used to combine the flour and butter to create the dough.
Pastry cutter: Helps to mix the butter into the flour until the mixture resembles coarse crumbs.
Plastic wrap: Used to wrap the dough discs before refrigerating them.
Saucepan: Used to cook the cherry filling until it thickens.
Rolling pin: Helps to roll out the dough discs into flat crusts.
Pie dish: The dish in which the pie is assembled and baked.
Knife: Used to trim the edges of the pie crust and cut slits in the top crust for steam to escape.
Measuring cups: Used to measure out the ingredients accurately.
Measuring spoons: Used to measure smaller quantities of ingredients like lemon juice and vanilla extract.
Refrigerator: Used to chill the dough discs for at least 30 minutes.
Floured surface: A surface dusted with flour to prevent the dough from sticking while rolling it out.
Time-Saving Tips for Cherry Pie
Prepare the filling in advance: Cook the cherry mixture the day before and store it in the fridge. This way, you can focus on the pie crust the next day.
Use a food processor: Quickly combine the flour and butter using a food processor instead of a pastry cutter or your hands.
Pre-measure ingredients: Measure out all your ingredients before starting. This will streamline the process and ensure you don't forget anything.
Chill the dough quickly: Place the dough discs in the freezer for 15 minutes instead of refrigerating for 30 minutes to save time.
Homemade Cherry Pie Recipe
Ingredients
Pie Crust
- 2 ½ cups all-purpose flour
- 1 cup unsalted butter cold, cut into cubes
- ¼ cup ice water more if needed
Cherry Filling
- 4 cups fresh or frozen cherries pitted
- 1 cup granulated sugar
- ¼ cup cornstarch
- 1 tablespoon lemon juice freshly squeezed
- 1 teaspoon vanilla extract
Instructions
- Preheat your oven to 375°F (190°C).
- In a mixing bowl, combine flour and butter. Use a pastry cutter or your hands to mix until the mixture resembles coarse crumbs.
- Add ice water a tablespoon at a time until the dough comes together. Divide the dough in half, shape into discs, wrap in plastic wrap, and refrigerate for at least 30 minutes.
- In a saucepan, combine cherries, sugar, cornstarch, lemon juice, and vanilla extract. Cook over medium heat until the mixture thickens, about 10 minutes. Let cool.
- Roll out one disc of dough on a floured surface and fit it into a pie dish. Pour the cherry filling into the crust.
- Roll out the second disc of dough and place it over the filling. Trim and crimp the edges, and cut a few slits in the top crust for steam to escape.
- Bake for 50 minutes or until the crust is golden brown. Let cool before serving.
Nutritional Value
Keywords
Suggested Appetizers and Main Courses
More Amazing Recipes to Try 🙂
- Air Fryer Whole Chicken Recipe1 Hours 10 Minutes
- Slow Cooker Chicken Recipe4 Hours 10 Minutes
- Banana Milkshake Recipe5 Minutes
- Baked Jalapeno Poppers Recipe35 Minutes
- Cranberry Pineapple Juice Recipe10 Minutes
- Carrot and Orange Juice Recipe10 Minutes
- Aebleskiver Recipe35 Minutes
- Vegan Coconut Curry with Pasta and Vegetables Recipe40 Minutes
Leave a Reply